
Noise in Images and How to Get Rid of It!!
In today’s age of digital SLR cameras, the image quality is amazing, but one thing we hear on a regular basis is still the issue of the noise or grain in images, especially images shot at low light. Now one of the greatest issues with photographers is the misunderstanding of noise and how it affects their images, actually understanding at which point excessive noise becomes detrimental to their images. Many people look for noise in the background of their images, as this is where it is likely to show up more, especially if there are darker areas in the background, this is however not as important as checking the detail on the actual subject you are photographing. To a large extent the noise in the background is of no issue at all, in reality noise becomes an issue when it starts to affect the detail of the subject you are photographing.
In this tutorial I will go through a quick and fairly simple post processing workflow on how to reduce noise effectively in your images, with out affecting the detail of your subject. For this tutorial I am going to use Adobes Lightroom 5 and Photoshop CS 6. Now there are probably thousands of methods and even third party applications and plugin that also reduce noise, some of which do a fantastic job and some not so much, this method I find to be the easiest to suggest as most or at least many photographers out there have access to these two programs or at least versions of them.
So here goes……….
Step 1
Process your image as you would normally in Lightroom, make all the adjustments you would like to. Only when reducing noise, only pay attention to your subject, ignore the noise in the background for now.
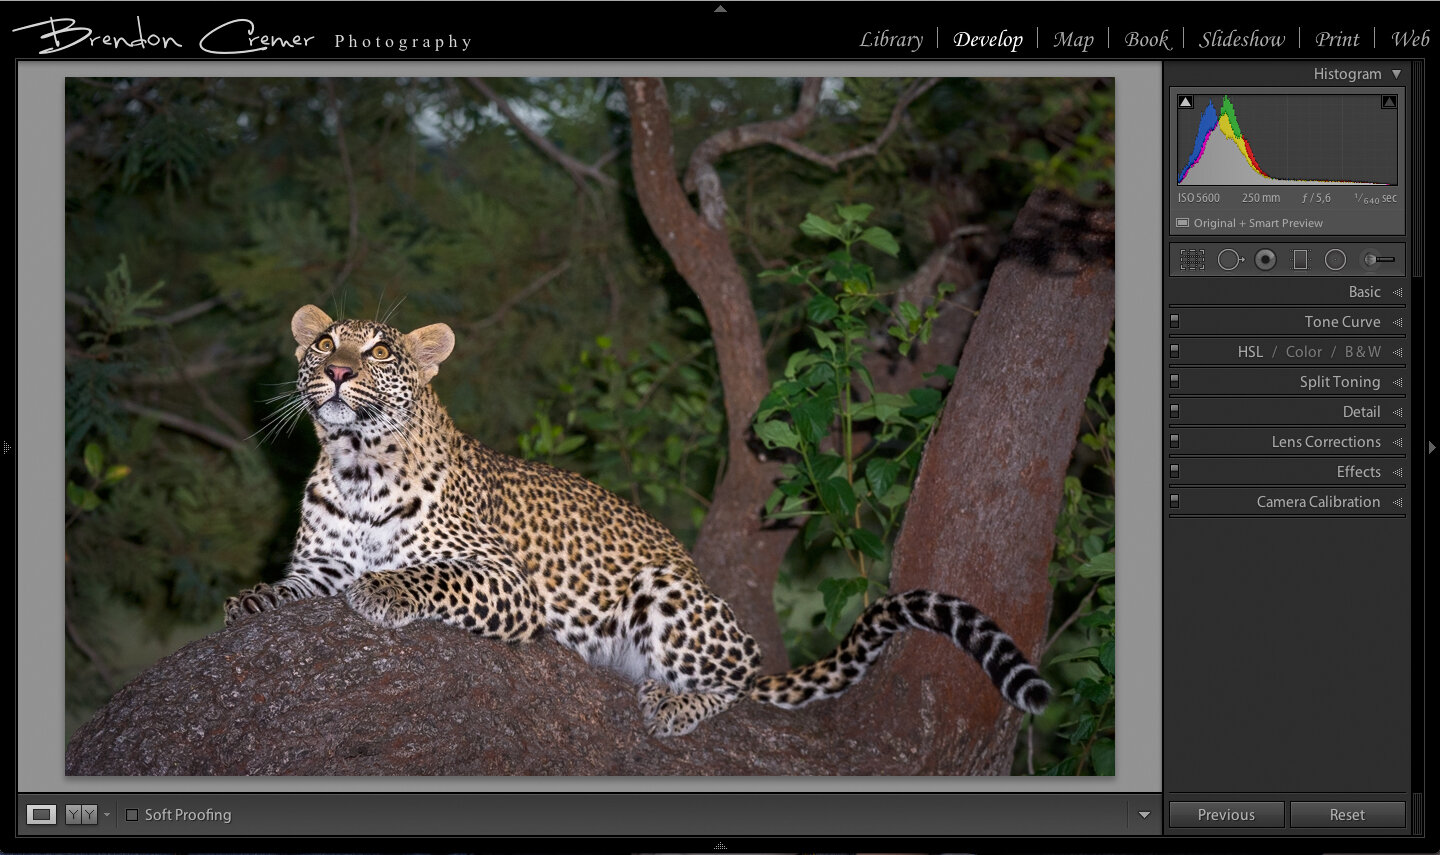
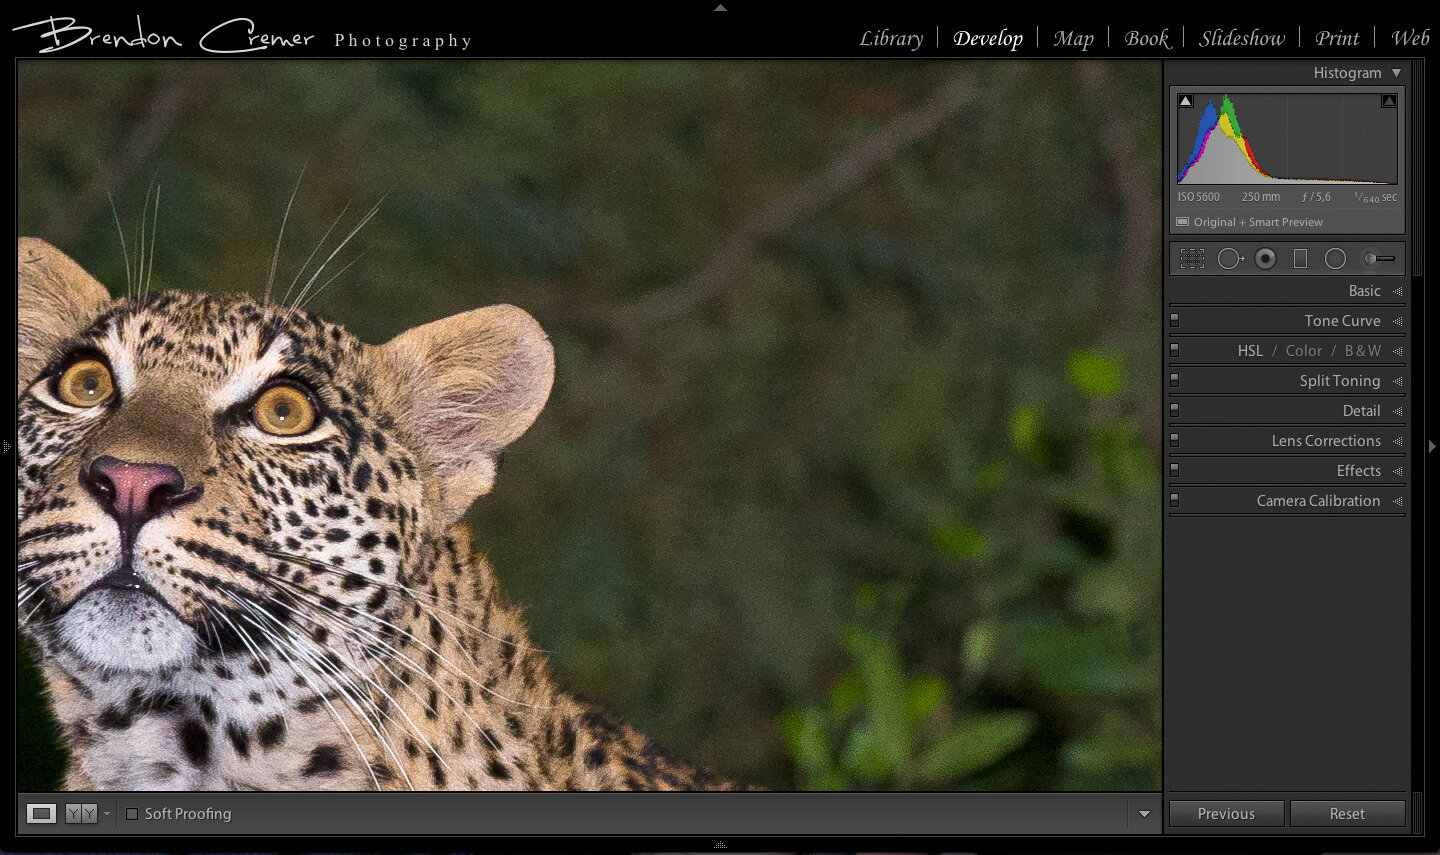
Once finished zoom into your image to see the noise in the background easier.
Step 2
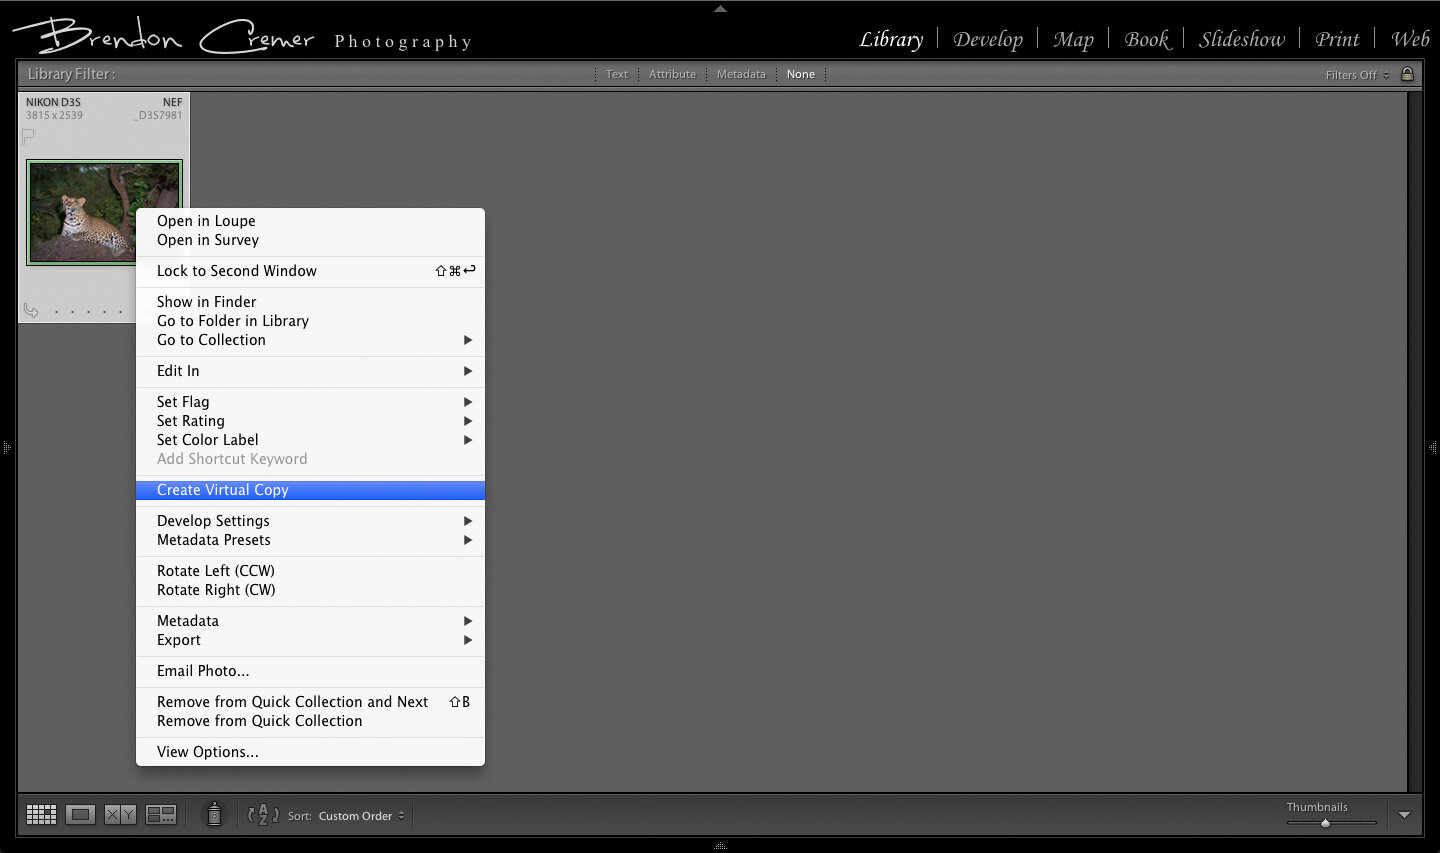
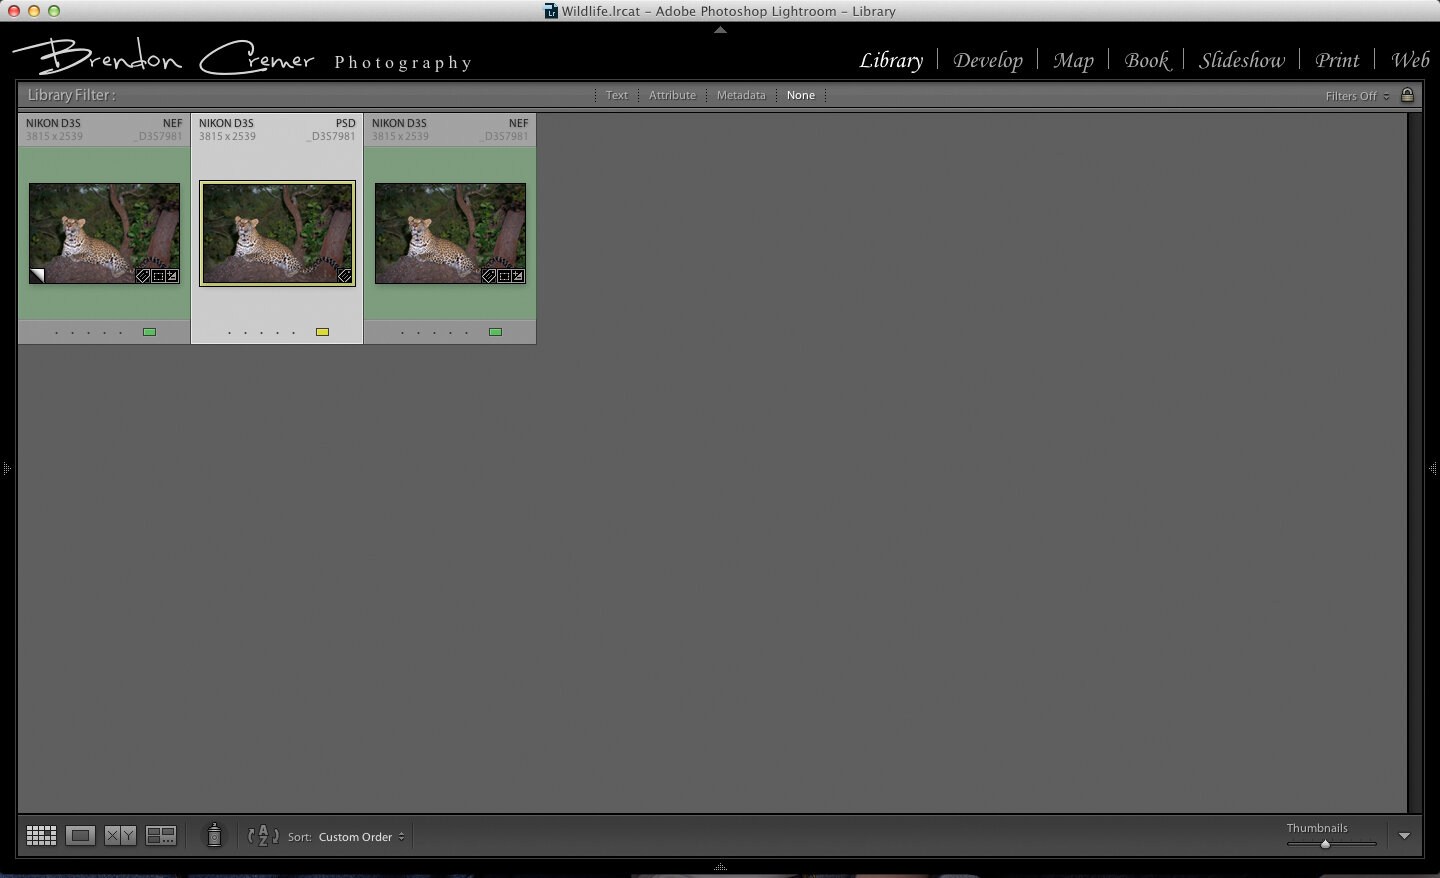
Go back to the grid view (G) of Lightroom and create a virtual copy of the image you just processed.
Step 3
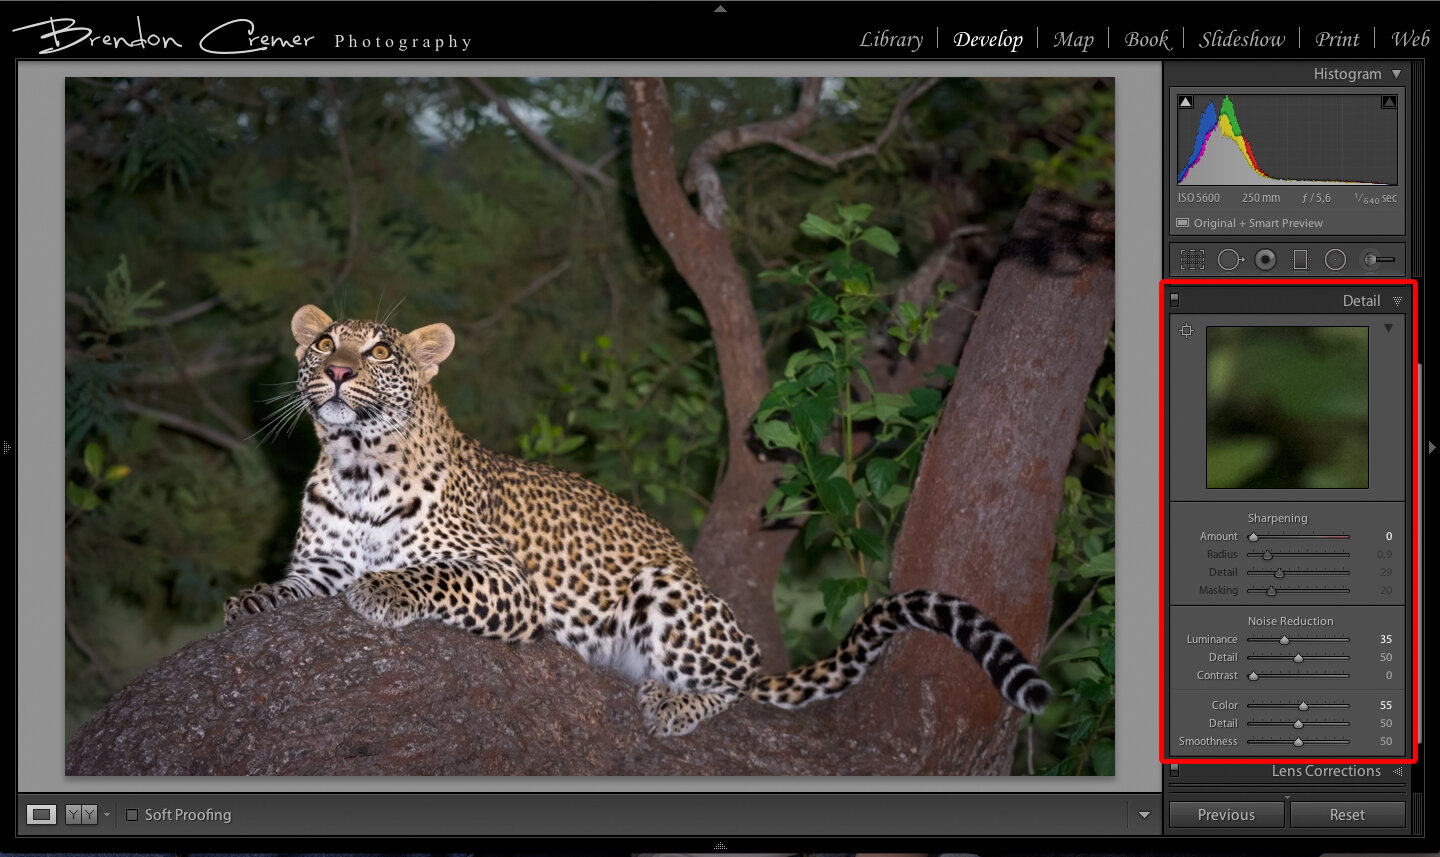
Open your virtual copy in the develop module and then go to the detail tab. Here all you are going to do is reset the sharpening amount slider to 0 and then under the Noise Reduction section, increase the Luminance slider until the noise in the background disappears, ignore the plastic look your subject may be getting.
Step 4
Once noise is reduced go back to the grid view and then open both the processed images (the first one you processed as well as the virtual copy) as layers in Photoshop, as in the image below. Note, be sure to select the virtual copy first, then the originally processed image before opening as layers in Photoshop.
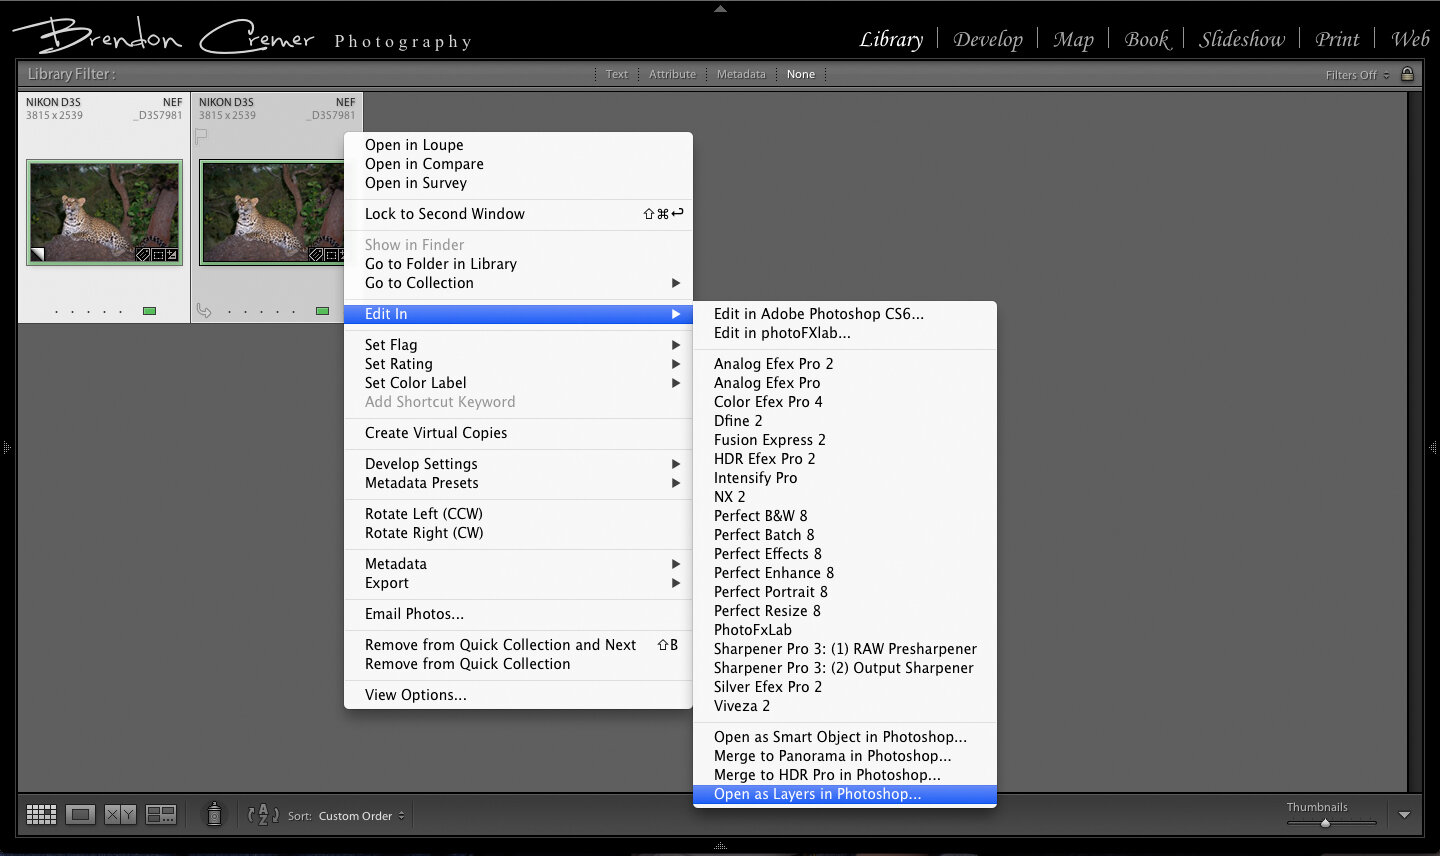
Once opened in Photoshop you will find the images already layered in the layer panel.

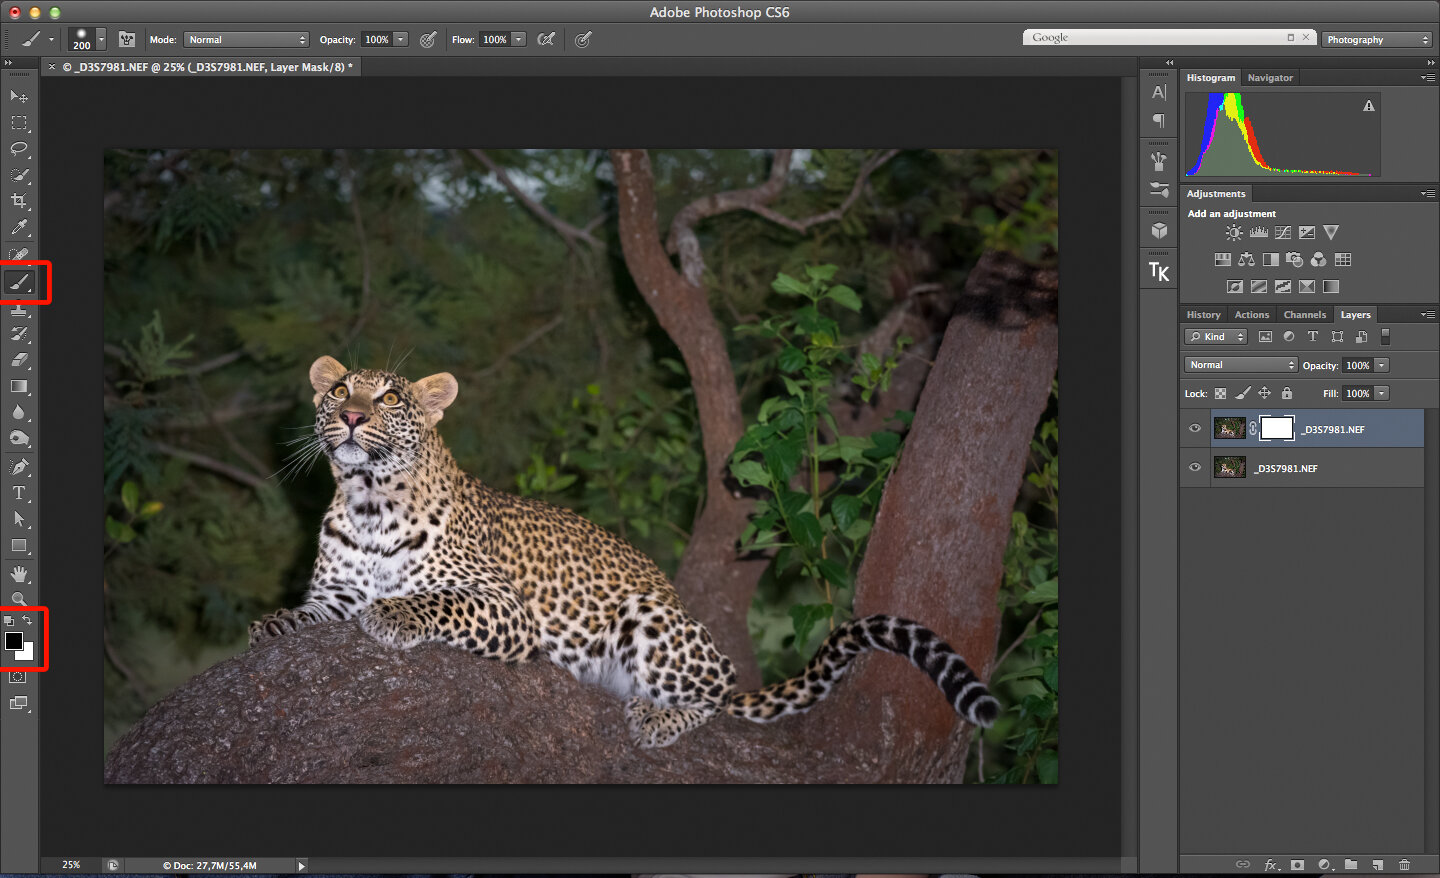
At this point the image with reduced noise should be the one on top, to check this zoom in and toggle the layer preview button on and off, as in the image below to see the image with the noise present.
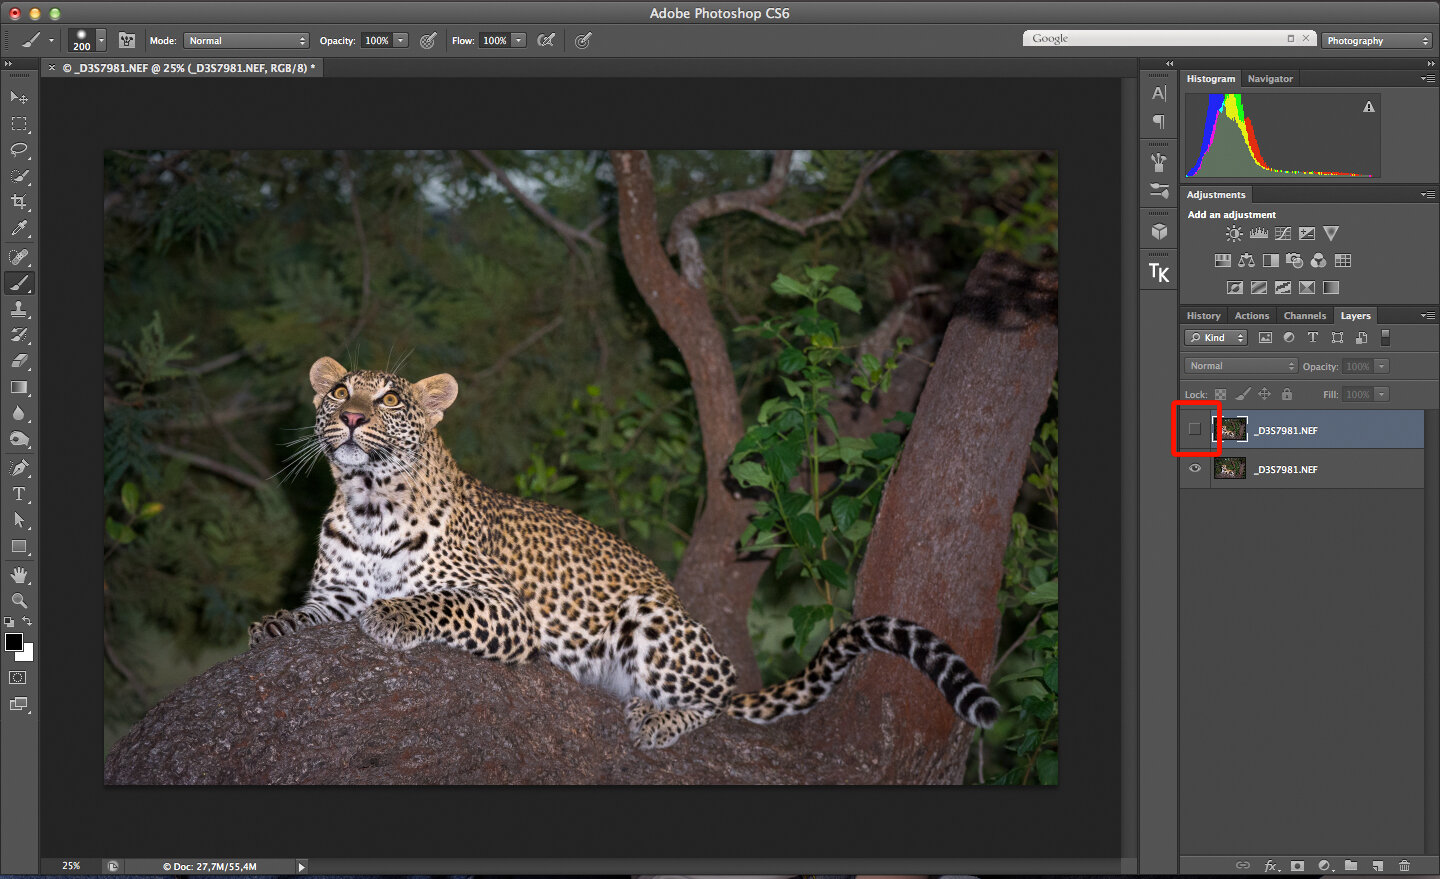
Step 5
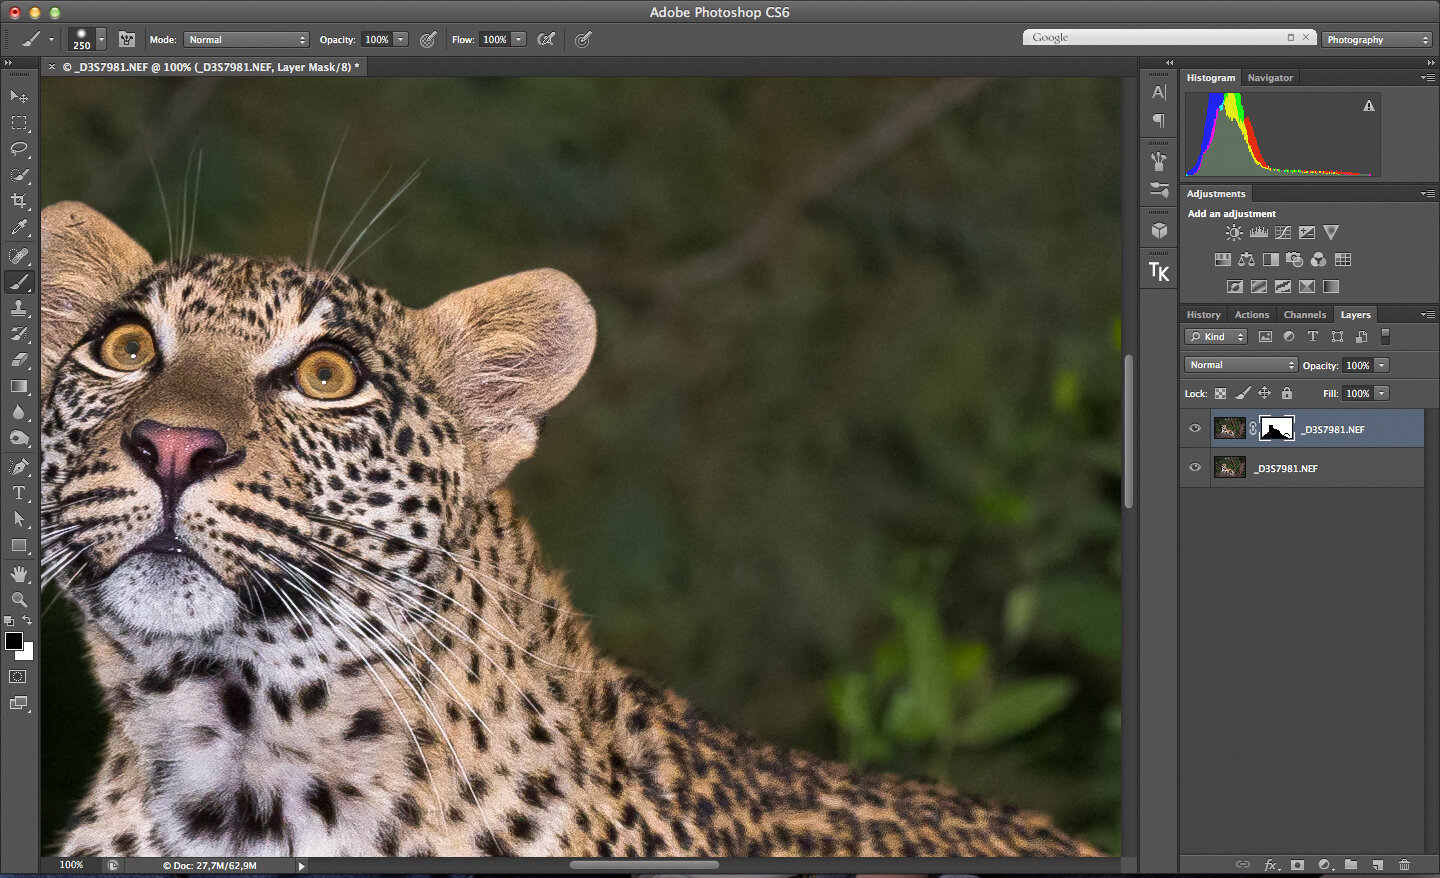
In this step we are going to add a layer mask over the top image, if you are unsure how to do this, see the below image for where to click and what the result should be.

Step 6
Once you have added the layer mask, select the brush tool and make sure your foreground and background colours are set to black and white, with black on top, as seen below.
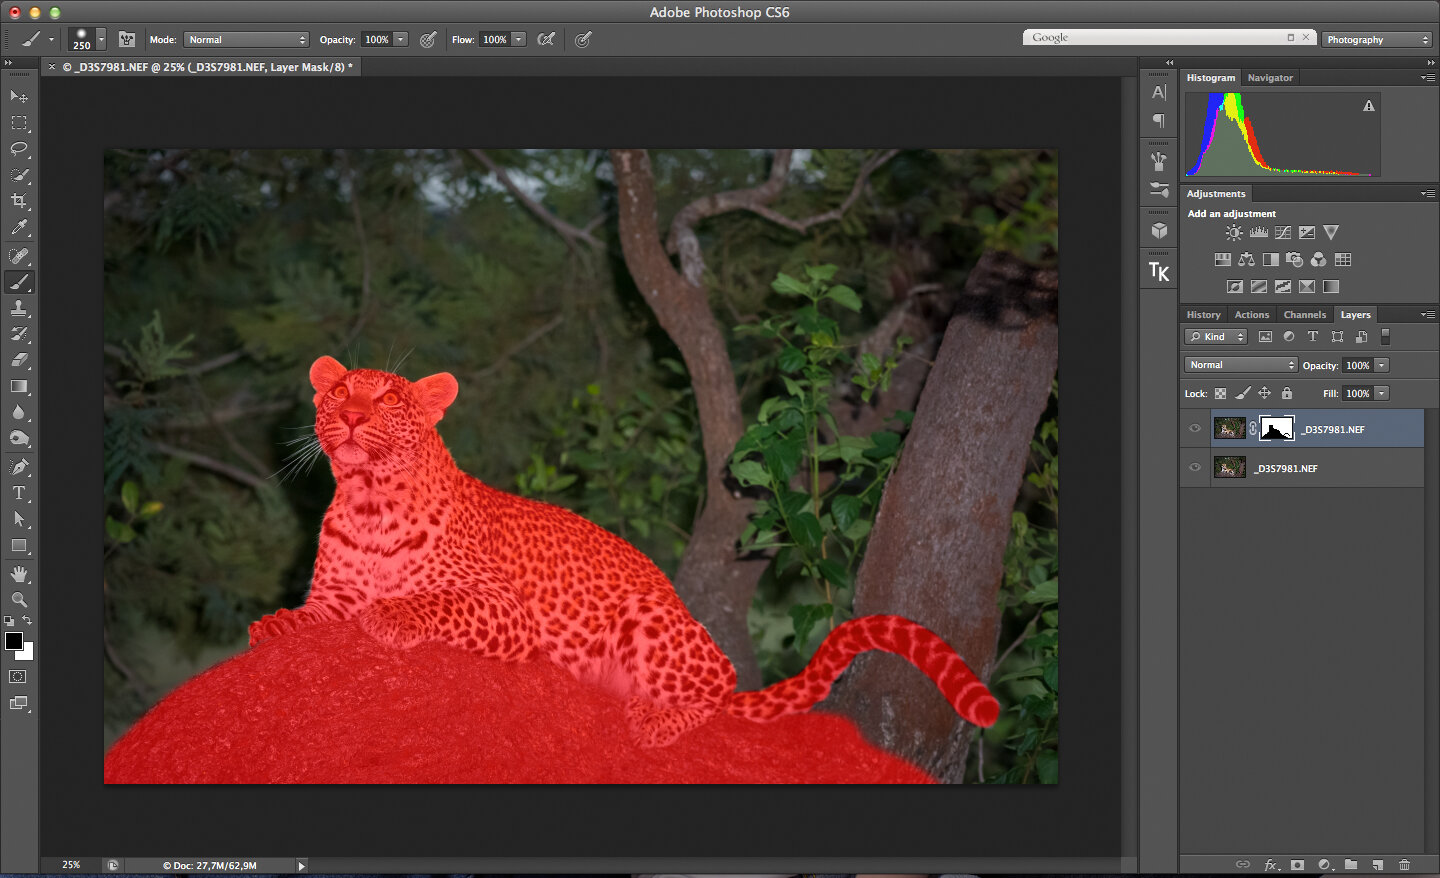
Step 7
Now as the image on top is the one with the noise reduced already, we want to brush away the area of the image where we want to reveal the detail, in this case it would be the leopard and part of the branch she’s lying on. As you start to brush press the back slash key (\) and your brush strokes will turn red, I find this easier to see where I’m working. Also as you bush you will notice that the sharpened image is being revealed from below the noise reduced one. In the image below you will see all the red where the detail will be shown from the image below the noise reduced one, which is still on top.
When complete, press the back slash key (\) again to turn off the red and zoom in, you should now see the result quite nicely, a nicely sharp subject with a clean noise free background.
Once happy, flatten the image if you would like, I prefer to maintain the layers for future just in case. Then click on save, not save as, and this will save the image back into Lightroom.
Here you can now do a comparison between the finished image and the originally processed image as below.

So as you can see, this process does produce great results, I hope it can work for you.
If you have any questions please feel free to contact me.